


-
- English
- Deutsch
- Spanish
-
- General Diagnostics
- Treatment
- Tools/Materials
- Basic/General Knowledge
- Research
- Events
- Organisations
-
-
-
-
-
-

-
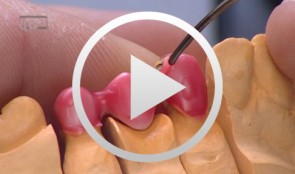

Zirconia Ceramic Restorations Vennered Using the Overpress Technique, part 2
Bußmeier, UweMaterials Checklist: Zeno Tec System Wieland Software: Dental Designer by 3shape Milling unit: Wieland 4030 Zirconia: ZENO® Zr; zirconia staining: Zircolor Investment material: PressX Zr Investment Press: IMAGINE Press with disposable plungers Ingots: PressXZR SHO-3; veneering ceramic: ZIROX Glaze: PressXZR Body Stain A3 / Glaze -
Restoration of a Class IV defect in the anterior segment
Hugo, Burkard -
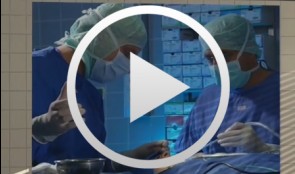
Treatment Concept for Extracting Impacted Lower Wisdom Teeth
Schultze-Mosgau, Stefan / Neukam, Friedrich Wilhelm / Basting, GerdContent: The removal of retained mandibular third molars is one of the most commonly performed surgical procedures. Because of the close anatomic positional relationship of the third molars to the adjacent teeth and to the inferior alveolar nerve, there is a risk of damage to the surrounding structures during surgical removal. For uncomplicated removal, knowledge of the different retention forms and a suitable atraumatic operation technique is important. After the block anesthesia of the inferior alveolar nerve and the buccal nerve, the cutting direction must be determined so that a mucoperiosteal flap with vestibular stem can be lifted. After the lingual subperiosteal insertion of a rasp to protect the lingual nerve, the third molar is exposed by buccal osteotomy with ball-shaped hard metal burs as far as its largest circumference and removed by careful luxation movements. Outline: - Schematic and radiologic demonstration of the different retention forms of low retained third molars and illustration of the indications for removal - Preparation of treatment documents and an explanatory discussion showing potential complications - demonstration of the surgical procedure: local anesthesia, cutting direction, protection of the lingual nerve, osteotomy, stitching technique -
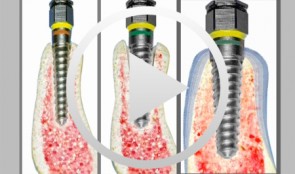
Bone Spreading, Bone Condensing (Split Control System)
Streckbein, Roland -
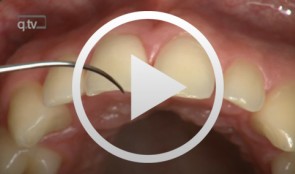
Composite Restoration in Anterior Teeth
Hugo, BurkardProcedure: - Introduction with control of the Gap Width and Colour Selection - Preparation of the Dental Surface (application of the Matrix) - Gap Closure, Final Polish Contents The present case shows the gap closure at tooth 22 with a direct adhesive technique. The gap closure is done here after the orthodontic treatment of a central diastema. A special matrix technique is used to allow a perfect design of the aproximal surfaces and the creation of the aproximal contact points. During the colour selection the dentin and enamel colours are chosen very carefully, to allow a good esthetic result and different composites are used to achieve a natural aspect of the tooth. -
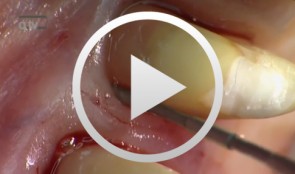
Flap designs for Interdental Tissue Preservation in Periodontal Therapy
Salvi, Giovanni E.Procedure: - Introduction: History -Taking, Examination, Diagnosis, Etiology, Prognosis for Individual Teeth - Four - Phase Treatment Sequence - Modified Papilla Preservation Technique(MPPT) - Simplified Papilla Preservation Technique (SPPT) - Findings 6 months after Surgery Synopsis The Modified and Simplified Papilla Preservation Techniques for conservation of interproximal papillary tissue were designed to provide access to deep and narrow bony defects to enable regenerative periodontal treatment. The Modified Papilla Preservation Technique (MPPT) was designed to ensure tension-free primary closure via barrier membranes in patients with small interdental spaces. The Simplified Papilla Preservation Technique(SPPT) is used to gain access to narrow interdental spaces ( < 2mm) and to deep defects in the lateral tooth region. Apart from preserving primary wound closure in the interdental space, the two techniques also serve to keep the membrane from collapsing into the bony defect. Both MPPT and SPPT employ special suture techniques to ensure tension-free primary closure of the interdental space. This video clip also serves to demonstrate that the two techniques of interproximal tissue preservation can also be used for periodontal interventions without regenerative measures. -
Incisal Edge Restoration and Repair
Frankenberger, RolandProcedure: Incisal Edge Restoration and Repair - Description of defect and problems related to its repair - Airborne particle abrasion and adhesive pretreatment - Biomimetic layering with enamel and dentine mass - Refining, production of halo effect, polishing Contents: The cervical fracture surface lies in the composite region of an underlying Black III cavity. In the past, this completely intact filling probably would have also been removed because of the fracture. Today, it is possible to treat the problem as a repair and leave the neighboring composite restoration in place while maintaining strict adherence to minimally invasive procedure. Even with the help of magnifying glasses, complete removal of the filling probably would have led to enlargement of the defect since the filling had been in place for 10 years. We therefore opted to pretreat the target area near the composite by means of intraoral airborne particle abrasion (Micro-Etcher system using 27 µm Al2O3 powder) before applying phosphoric acid to the enamel and dentine for conventional conditioning. This was followed by the bonding procedure, comprising the application of dentine adhesive to enamel, dentine and the aged composite material. This technique has already been described in the recent literature (Frankenberger et al. Am J Dentistry, 2003). The reconstruction was performed using an enamel and dental mass of esthetic composite material with the help of a silicone key positioned palatinally. This makes it possible to achieve a biomimetic and natural restoration, including a halo effect. Last photograph: Next recall. -

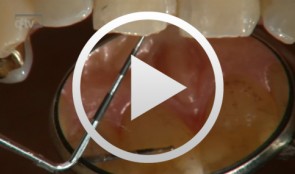
Regenerative Treatment of Class II Mandibular Furcation Defects
Heinz, BerndProcedure Case description: -Class II furcation defect at teeth 46 and 47 and gingival recessions at teeth 43 and 44 - Root planing using PerioSet - Incision technique - Cleaning furcation defect at tooth 46 - Pref Gel application, rinsing and Emdogain application - Insertion of Bio-Oss into the furcation space with an amalgam plugger after hydration - Condensation of the bone replacement material and application of an absorbable membrane (Bio-Gide) - Atraumatic suture closure using 6/0 Seralene Contents: This video demonstration shows the simultaneous treatment of recessions at teeth 43 and 44 and of class II furcation defects at teeth 46 and 47. After a brief case description, root planning is done using PerioSet. Next, an incision is made and the furcation defects are very carefully cleaned using hand instruments and ultrasonic scalers (Soniflex). The cleaned root surfaces and furcation defects are conditioned with Pref Gel (Straumann) for two minutes. The objective of conditioning is to remove the smear layer, to open the dentine tubules, and to enable surface demineralization. Moreover, this measure serves to optimize the contact between Emdogain and the root surface. After two minutes, the EDTA suspension is removed using physiological saline solution or water spray. Immediately afterwards, Emdogain is applied to the blood and saliva-free root surface. This procedure was also used to treat the furcation defect at tooth 47. Regenerative treatment of tooth 46 was performed since that tooth had a very extensive furcation defect. The defect was filled with Bio-Oss, which was applied using an amalgam plugger. Absorbable Bio-Gide was used for coverage of the furcation entrance. Finally, the wound was closed using loop sutures and single interrupted sutures. -
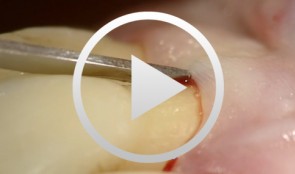
The Carnevale Technique: Hemisection/Trisection of Molars with Furcation Involvement
Hürzeler, Markus B.Procedure: - Apical Flap Repositioning - Trisection of the Upper Molar - Extraction of the Distobuccal Root - Tangential Preparation of the Abutment Teeth - Temporary Relining Contents: Molars with furcation involvement have a shorter long-term prognosis for tooth retention than single-rooted teeth. Apart from replacing these teeth with implants, they can also be treated by hemisection or trisection with the goal of eliminating furcation and creating single-root conditions. Studies on the long-term stability of teeth treated by hemisection / trisection show mixed results. Some investigators have found failure rates of up to 40 percent. In Gianfranco Carnevale's group, on the other hand, success rates of more than 90 percent have been reported for a 10-year follow-up period. Pretreatment: Initial work on the abutment teeth, which had grade II-III furcation involvement, was done six to eight weeks after conservative periodontal therapy in preparation for placement of the long-term temporary. Preparation was done tangentially, up to the bone level, to spare as much dental hard tissue as possible while eliminating all recesses and root concavities. A metal-reinforced long-term temporary was used to splint the prepared teeth. Endodontic treatment of the affected teeth was subsequently performed. Surgical procedure: Apical displacement of the gingiva around the involved teeth was done before incision. A mucosal fl ap was created on the buccal and palatal sides. Trisection of the teeth was then performed. After dissecting and excising the distobuccal root, intraoperative preparation of the abutment teeth was carried out. Temporary relining was another important step, the objective of which was to splint the root and to prevent tilting. Further treatment: Impressions for the defi nitive restoration were made six months postoperative. The restoration margins of the tangential preparation were defined using a master model. The definitive reconstruction had fine metal margins. -
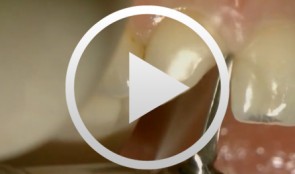
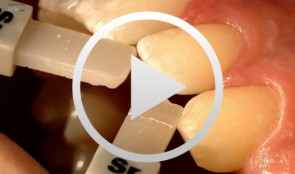
Gap Closure with a Minor Incisal Edge Restauration
Klaiber, BerndProcedure: - Incisal edge restoration at Tooth 11 - Sketch prior to widening procedure in anterior teeth region - Placement and shaping of matrix band retainer used for tooth widening - Application of composite material and spreading with small Heidemann spatula to establish stable and broad approximal contact - Application of dentin and enamel composite - Shaping and completing; positioning of the lateral edge lines; shaping the interincisal triangle. - Creation of an invisible transition, composite/enamel, with scalpel #15 - Polishing Materials Adhesive: Optibond Fl (Kerr) Composite: Enamel HFO (Micerium) Dentin UD4, UD3,5 and UD3 Enamel GE2 Opalescence OBN Flowable Composite: Tetric Flow A4 (Vivadent) Temporary Composite for shaping of matrix band retainer SystepOnlay (Vivadent)